Nearly five years into design, most of what I know about building products came from doing it. I trained in visual communication; everything I know about user experience I learned on real projects. This is the process I worked out for myself, in four stages, written without the jargon.
When I used to search for how to do product design — where do you even start? — almost everything I found was about how to use a tool. Very little was about the process itself. So this is my attempt to write down the one I arrived at.
1. Flow chart — the skeleton
I think of the flow chart as the product’s skeleton. Without the big bones, nothing else can stand up.
I am a product designer at AlleyPin, where we build digital services for clinics on top of LINE. Our requirements move with the market, so we work in MVPs: get it working, then get it right. Early on, that made it easy to get lost in the user stories sales brought back — a lot of time spent, and results that fell short.
Now, before I design any new feature, I map the whole flow first. It is what makes sure everyone on the team shares the same logic for how a feature is operated.
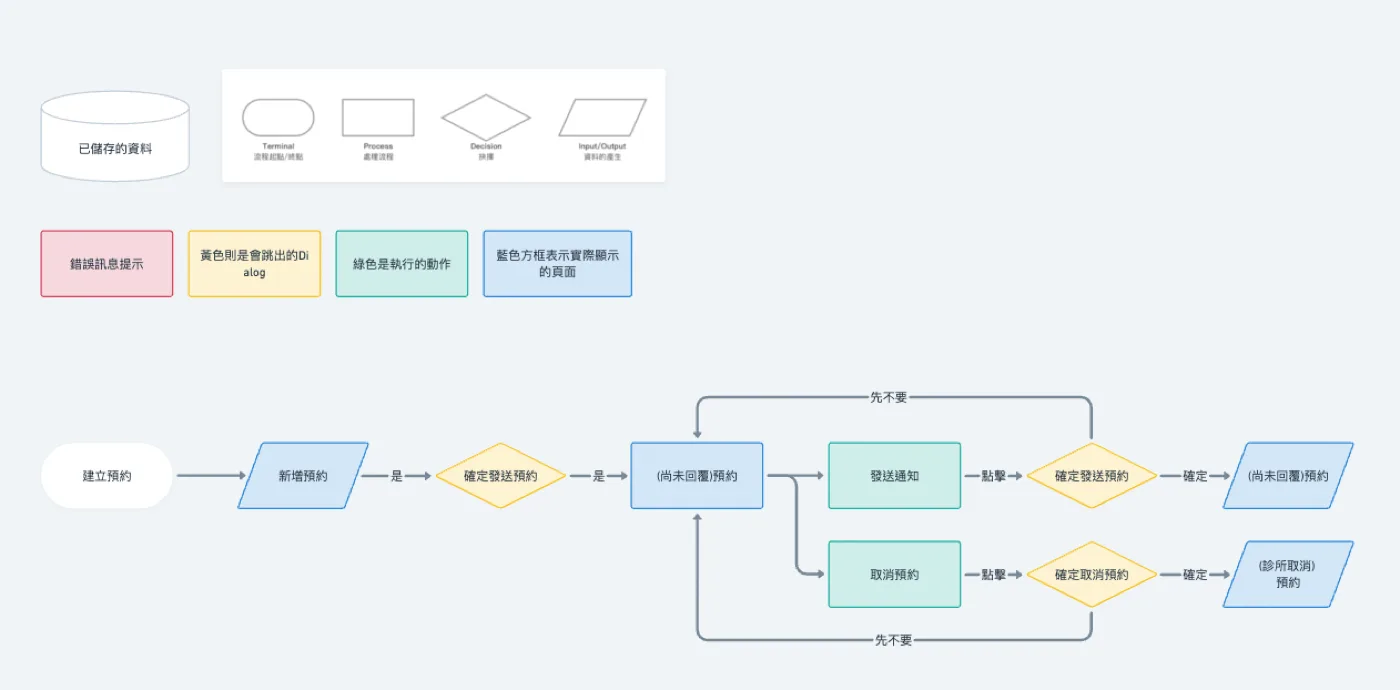
Start by writing down the tasks the flow has to carry — that is placing the big bones. Keep the chart focused on how each task begins and ends.
Done this way, it lets designers and engineers see how data moves and where a step needs a warning or extra input — which later decides which flows appear on which screen in the wireframes.
2. Functional map — the small bones
If the flow chart is the skeleton, the functional map is the smaller bones. The big frame holds the product up, but it needs the rest to move.
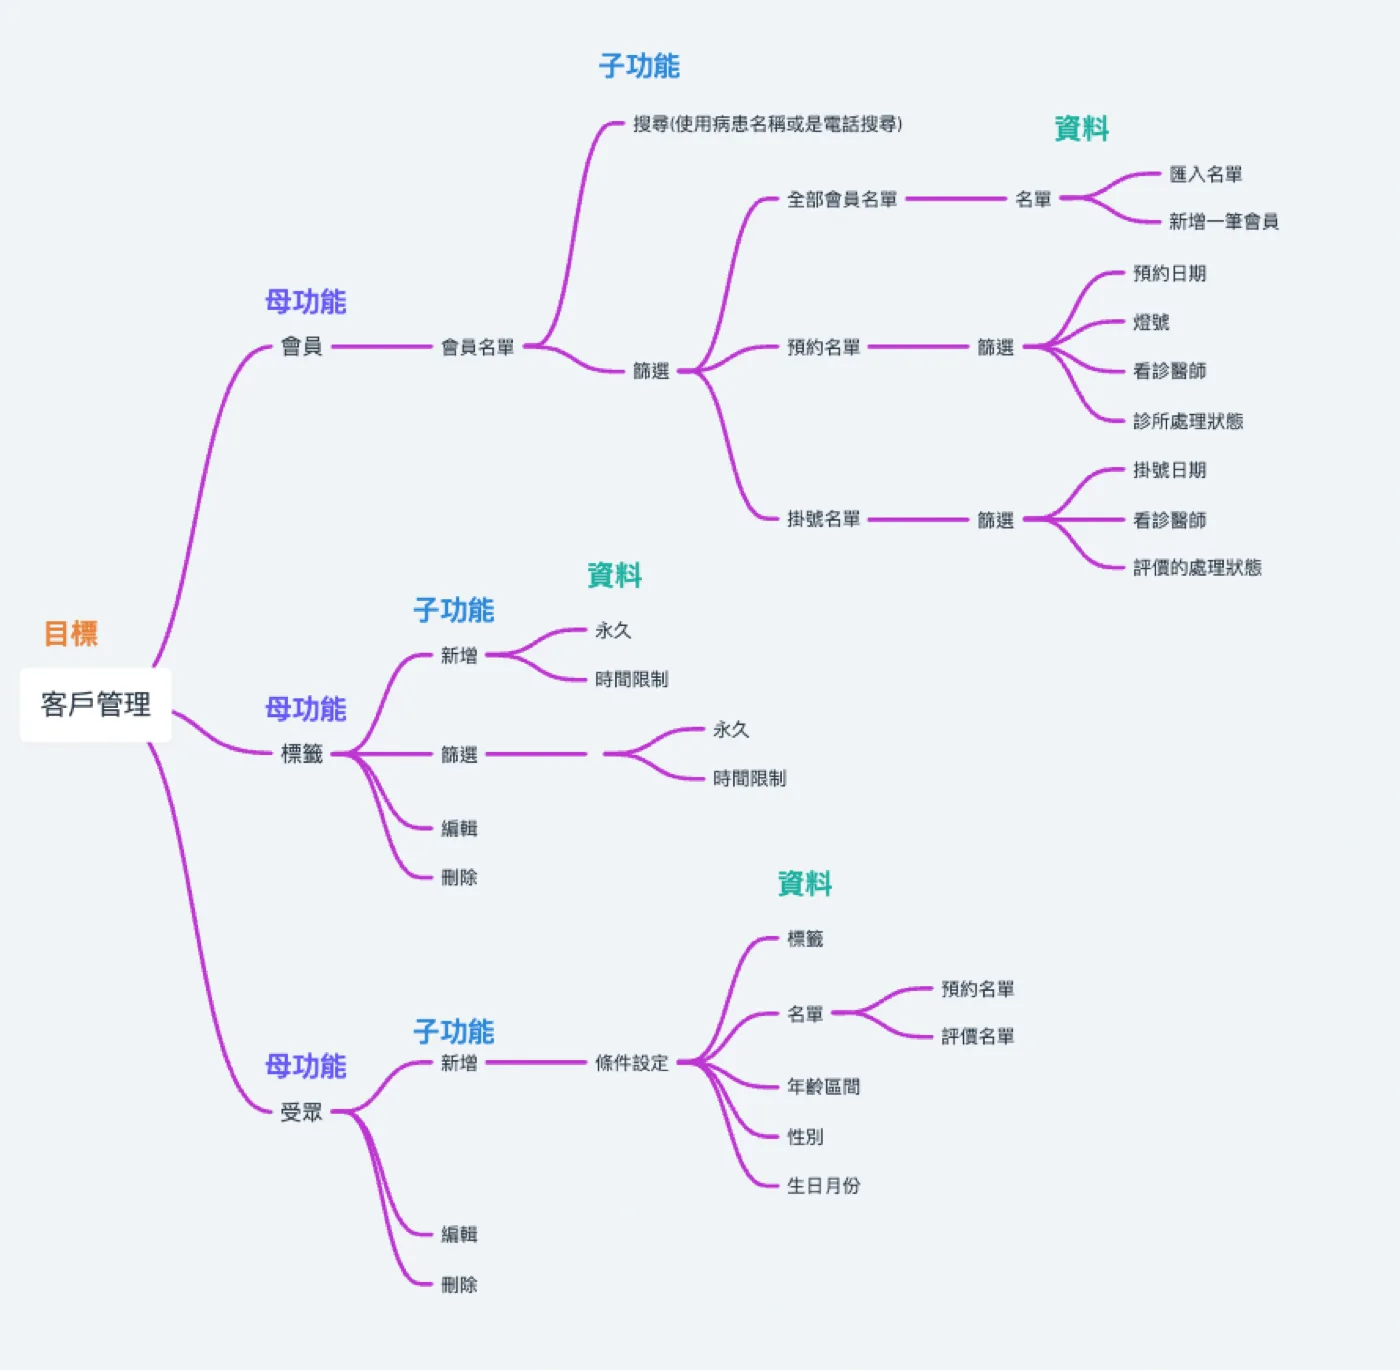
This is where we work out which fields a new feature needs, and where front-end and back-end engineers can see which data is new and has to be planned for.
I build the map from the goal outward: parent functions, child functions, and the information under them. The goal comes from the flow chart and the user story; I list the functions and fill the data in beneath each child. Bigger features get more levels.
Through the design I keep coming back to the map to pull data into the screens. Its real value is that the whole team can see the feature in one view.
3. Wireframe — the body
The designer takes the task flow from the flow chart and the right data from the functional map, and puts them on the page. I call the wireframe the product’s body.
This is the stage where the people on the project first really see the product. In my experience, even with the flow chart and the functional map done, the team is still squinting at it through fog. Everyone imagines the product differently, and the designer is the one who has to give it a body.
I tend to go straight to a high-fidelity prototype. It settles the layout, and it gives the team something concrete to agree on.
I lay wireframes out horizontally, one feature’s flow per row, so that in a demo nobody loses track of which feature is being discussed. I also try to get all the required data onto the wireframe rather than leaving it for the UI stage — it keeps the thinking on the information and off the visuals.
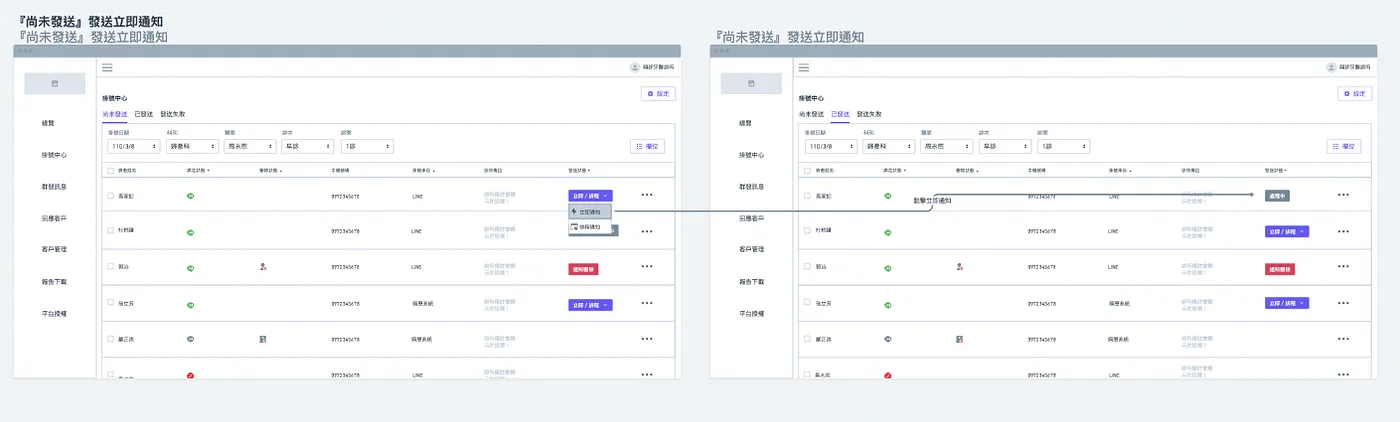
I once demoed every feature at once on a single screen. Nobody in the meeting could focus on any one of them. A thoroughly failed demo, and a lesson.
4. UI — the skin
I call the UI the product’s skin: its complexion, its hair, its features. This is the first stage where those get thought about.
UI is the part everyone knows. Early on, I would skip the previous stages for small features — it’s tiny, why bother? — and learned the hard way that none of them are optional. Skip them and the UI stage produces something with a surface and no clear function or structure underneath.
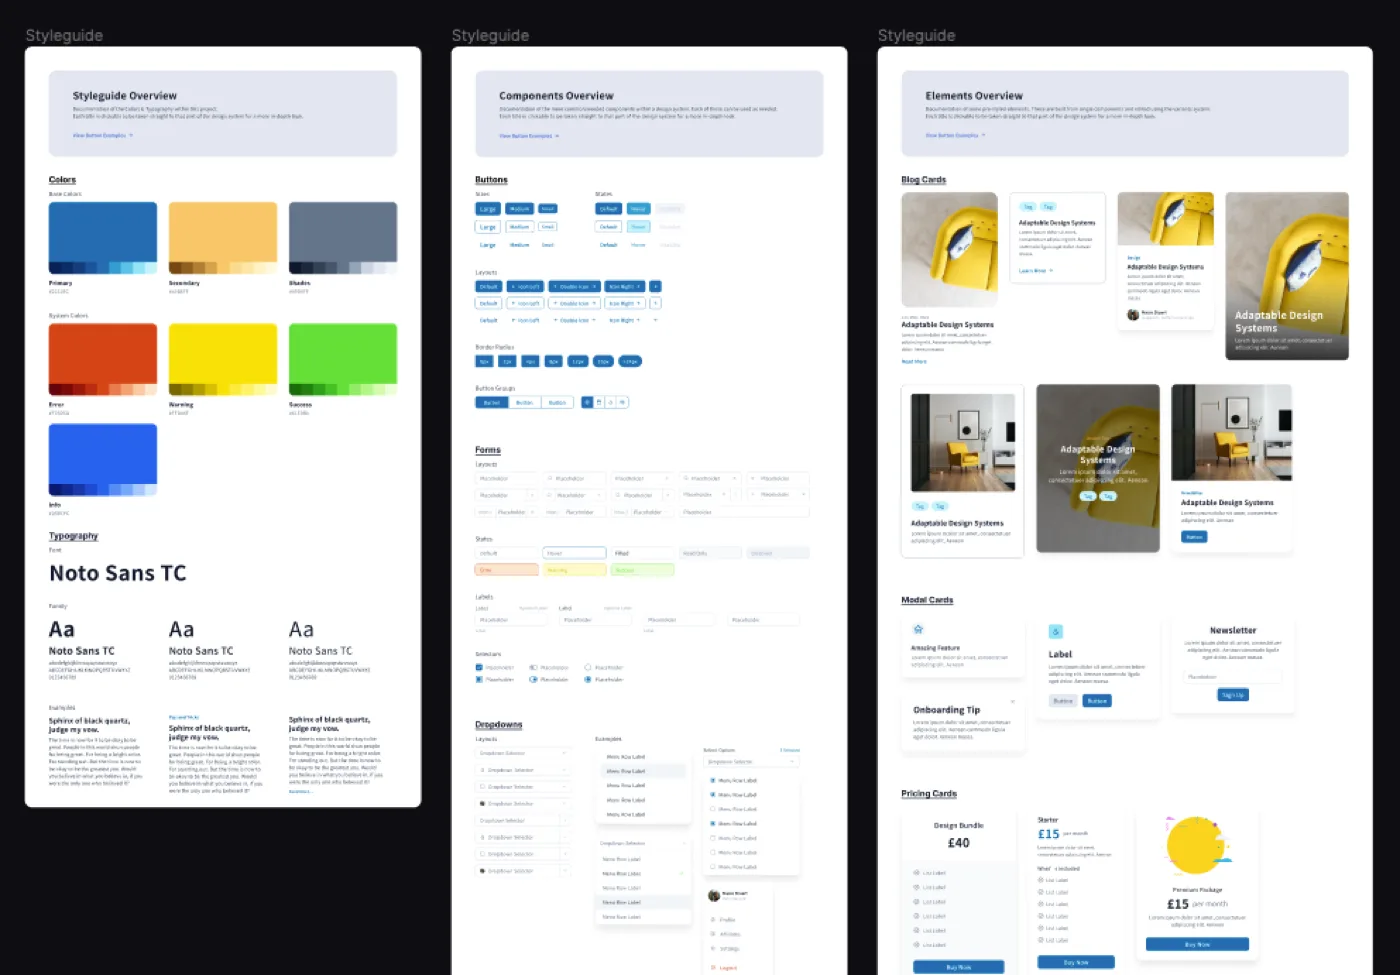
I design with the company’s design system, which keeps our products consistent and makes this the easiest stage of all. Because the high-fidelity prototype is already detailed, the work is mostly pulling components from the library into place.
Getting better at this
The fastest way I have found to improve at product design is to keep asking, in everyday life, whether something could be built and how. Hackathons do the same in a compressed form.
And the habit of judging other products — what works, what doesn’t, and why — sharpens design sense faster than almost anything.